Quick Start
OpenSumi allows integration in two ways: Web and Electron. The extension system and its capabilities have a consistent performance on both platforms.
When developing a extension, you can quickly start the extension development environment locally using @opensumi/cli. Install it by running:
$ npm install @opensumi/cli -gInitialize the extension template
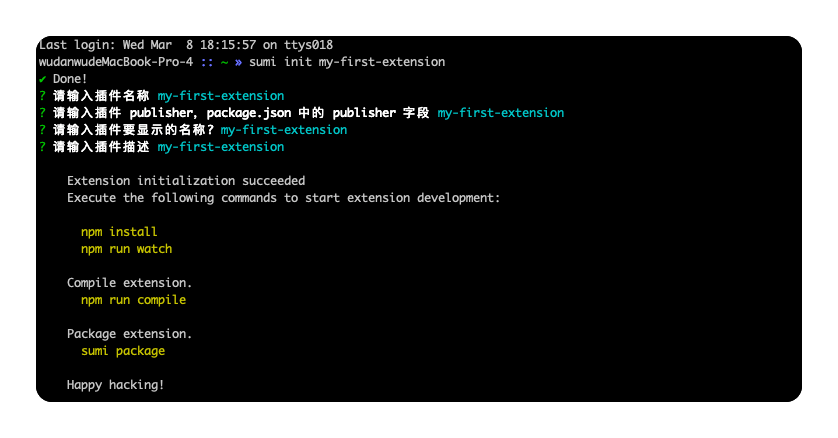
run sumi init and enter the extension name, publisher, displayName, and description as prompted.

Running extension
Install the dependencies using:
$ npm installExtensions initialized based on @opensumi/cli include basic running and building scripts in package.json. It is recommended to run npm run watch in the background during the development stage to compile the extension code in real time.
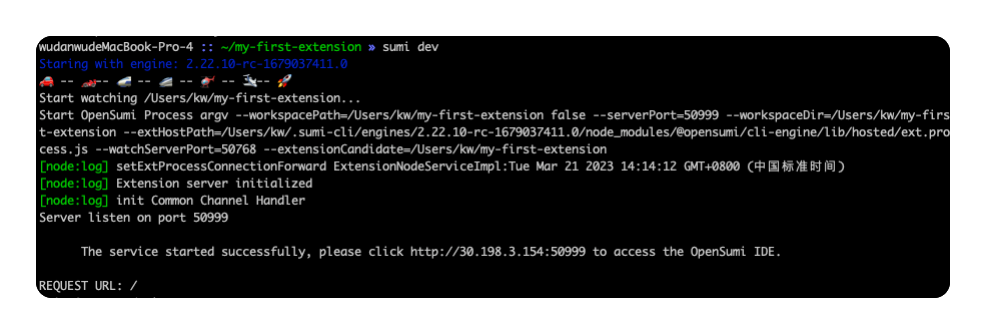
Run npm run dev in the extension directory to start a web version of OpenSumi IDE and load the current extension into it.
{
  "scripts": {
    "compile": "sumi compile",
    "watch": "sumi watch",
    "dev": "sumi dev -e=$(pwd)"
  }
}
Or run the development command of @opensumi/cli directly in the extension directory, sumi dev
$ sumi watch # Monitor and compile code automatically
$ sumi dev   # Start the OpenSumi Web version development environment
Open http://127.0.0.1:50999 in the browser to open a web version of OpenSumi IDE.
Command usage### Engine Version Control
In OpenSumi, there are many release versions. Before developing a extension, you need to make sure that the extension API you are using is supported by the corresponding OpenSumi Engine version. You can check the current version information through the following command:
$ sumi engine ls
You can see all OpenSumi Engine version information by the following command:
$ sumi engine ls-remoteWhen switching versions, you only need to switch with the following command:
$ sumi engine use {version}When encountering abnormal performance of extension functions, updating OpenSumi Engine to the latest version for testing is a more effective means of verification.
Set compilation success callback
When running the sumi watch command, OpenSumi CLI supports executing a callback after each successful compilation, for example:
$ sumi watch --onSuccess 'echo hello world'specify the working directory
Support specifying working directory when running sumi dev command
$ sumi dev -w=/path/to/vscodeThis will start OpenSumi IDE with the path passed in as the workspaceDir parameter and the current directory as the extension, as shown in the image below:

Specify the base plugin
OpenSumi CLI does not have any built-in plug-ins. When your plug-ins rely on some capabilities of other plug-ins, you can soft-link or directly copy these plug-ins to the plug-in directory of OpenSumi CLI. The default plug-in directory is .sumi-dev in the user's Home directory /extensions.
Specify IDE Server port
OpenSumi CLI supports specifying the listening port of IDE Server via -p, the default is 50999.
$ sumi dev -p=8989 # ...debug
# Run in the extension directory
$ sumi dev --debug # Start OpenSumi IDE debug mode

# or specify the extension directory
$ sumi dev --debug -e=/path/to/ext1,/path/to/ext2
Use VS Code / OpenSumi IDE for breakpoint debugging
The Extension Host Process is a Node.js process, and the extension code can be debugged by configuring launch.json in VS Code.
// A launch configuration that compiles the extension and then opens it inside a new window
// Use IntelliSense to learn about possible attributes.
// Hover to view descriptions of existing attributes.
// For more information, visit: https://go.microsoft.com/fwlink/?linkid=830387
{
  "version": "0.2.0",
  "configurations": [
   {
     "type": "node",
     "request": "attach",                           // Attach mode
     "name": "Attach to Extension Host",
     "port": 9889,                                  // extension process port, not modifiable
     "skipFiles": ["<node_internals>/**"],
     "sourceMaps": true,                            // Turn on SourceMap for easy source mapping
     "outFiles": ["${workspaceFolder}/out/*/.js"]   // Specify the extension code output directory
   }
}
Select Attach to Extension Host in the VS Code debug panel to use VS Code for breakpoint debugging

The principle of debugging on the local client developed based on OpenSumi is also the same, just place the configuration file under .sumi/launch.json.
If you need to perform breakpoint debugging in typescript source code, you need to enable Sourcemap when compiling
Specify the operating environment
Currently, the desktop (Electron) version of the IDE based on the OpenSumi framework is supported as the extension runtime environment.
run in terminal
$ sumi dev -e=/path/to/ext1,/path/to/ext2 --execute=/path/to/IDEThe --execute parameter indicates the path of the desktop IDE executable file, for example:
#Windows
$ sumi dev -e=/path/to/ext --execute=/C:\Program Files\OpenSumi\OpenSumi.exe --debug

# MacOS
$ sumi dev -e=/path/to/ext --execute=/Applications/OpenSumi.app/Contents/MacOS/OpenSumi --debug
When using the desktop version of the IDE, since the desktop version of the IDE may include pre-processes such as creating and selecting projects, it is not possible to specify
workspaceDirthrough parameters.
Package Extension
Use the sumi package command to package your extension.

$ sumi packagePlease make sure that the extension package.json contains a scripts script named prepublish.
{
  "scripts": {
    "prepublishOnly": "/* your compile script */"
  }
}
This will first run npm list to analyze dependencies. If you need to package the node_modules of the extension project, it is recommended to use npm install --production to install dependencies, which will only install the modules necessary for runtime.
Exclude directories
When running the sumi package command, it supports specifying excluded files or directories. Create a new file named .vscodeignore under the extension project. The format is similar to .gitignore. It supports glob pattern matching directories and will be excluded when packaging. these files:
#.vscodeignore
node_modules/
src/
yarn-error.log
#...
Or pass --ignoreFile parameter to specify ignore file
$ sumi package --ignoreFile=/path/to/.ignore