通过 DI 注册并使用服务
DI (依赖注入) 是 OpenSumi 框架的核心机制之一,通过 DI,我们能很容易的实现依赖的解耦及服务的复用,详细介绍可见:依赖注入 文档。
本节内容将从案例出发,注册 ITodoService 服务,同时使用框架提供的 IMessageService 服务能力,Todo 项切换状态时展示切换信息。
注册服务
声明 ITodoService 服务接口:
// modules/todo/common/index.ts

export interface ITodoService {
  showMessage(message: string): void;
}

export const ITodoService = Symbol('ITodoService');
实现 ITodoService 服务:
// modules/todo/browser/todo.service.ts

import { Injectable, Autowired } from '@opensumi/di';
import { IMessageService } from '@opensumi/ide-overlay';
import { ITodoService } from '../common';

@Injectable()
export class TodoService implements ITodoService {
  showMessage(message: string) {
    console.log(message);
  }
}
注册 ITodoService 服务及其对应实现:
// modules/todo/browser/index.ts

import { Provider, Injectable } from '@opensumi/di';
import { BrowserModule } from '@opensumi/ide-core-browser';
import { TodoService } from './todo.service';
import { ITodoService } from '../common';

@Injectable()
export class TodoListModule extends BrowserModule {
  providers: Provider[] = [
    {
      token: ITodoService,
      useClass: TodoService,
    },
    ...
  ];
}
使用自定义服务
在视图中,我们实现了一个 useInjectable 的 hook 用于在视图层使用 DI 注册的服务,通过在视图中实现如下代码�便可获取到 ITodoService 实例并使用:
// modules/todo/browser/todo.view.tsx

export const Todo = ({
  viewState
}: React.PropsWithChildren<{ viewState: ViewState }>) => {
  const { showMessage } = useInjectable<ITodoService>(ITodoService);
};
使用内置服务
消息通知
OpenSumi 内所有的能力基本上都以 DI 的形式存在,我们可以便捷的通过 DI 引入并使用,例如这里我们需要一个消息通知功能,我们便可以使用 IMessageService 来获取并使用该能力。
// modules/todo/browser/todo.service.ts

import { Injectable, Autowired } from '@opensumi/di';
import { IMessageService } from '@opensumi/ide-overlay';
import { ITodoService } from '../common';

@Injectable()
export class TodoService implements ITodoService {
  @Autowired(IMessageService)
  private messageService: IMessageService;

  showMessage = (message: string) => {
    this.messageService.info(message);
  };
}
通过在点击 Todo 项的时候绑定触发函数,就可以直接使用 IMessageService 来展示消息。
// modules/todo/browser/todo.view.tsx

export const Todo = ({
  viewState
}: React.PropsWithChildren<{ viewState: ViewState }>) => {
  const { width, height } = viewState;
  const [todos, setTodos] = React.useState<ITodo[]>([
    {
      description: 'First Todo',
      isChecked: true
    }
  ]);
  const { showMessage } = useInjectable<ITodoService>(ITodoService);

  const template = ({ data, index }: { data: ITodo; index: number }) => {
    const handlerChange = () => {
      const newTodos = todos.slice(0);
      newTodos.splice(index, 1, {
        description: data.description,
        isChecked: !data.isChecked
      });
      showMessage(`Set ${data.description} to be ${!data.isChecked}`);
      setTodos(newTodos);
    };
    return (
      <div className={styles.todo_item} key={`${data.description + index}`}>
        <CheckBox
          checked={data.isChecked}
          onChange={handlerChange}
          label={data.description}
        />
      </div>
    );
  };

  return (
    <RecycleList
      height={height}
      width={width}
      itemHeight={24}
      data={todos}
      template={template}
    />
  );
};
效果展示

通过快捷键添加项
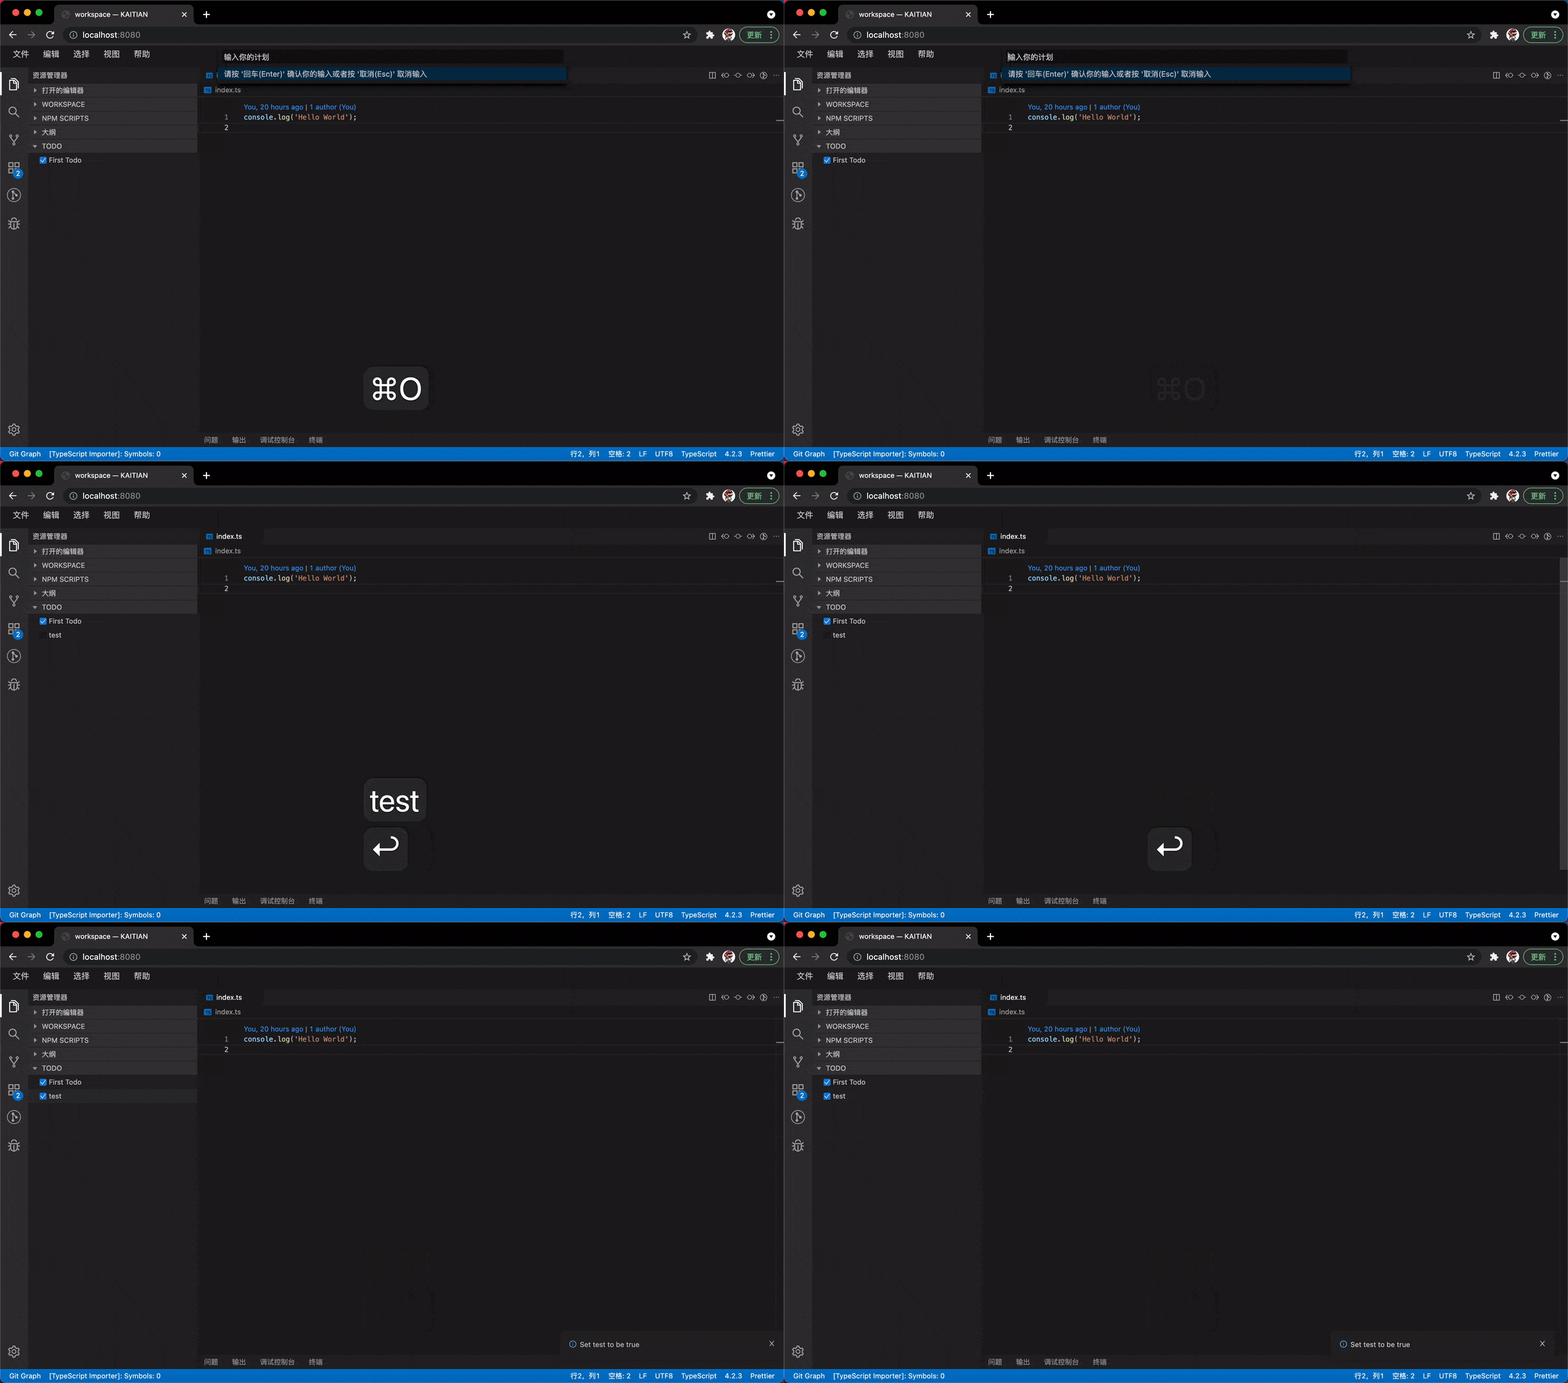
进一步的,我们还可以通过贡献点机制注册命令和快捷键,借助 IQuickInputService 来实现添加 Todo 项的能力。
// modules/todo/browser/todo.service.ts

import { Injectable, Autowired } from '@opensumi/di';
import { IMessageService } from '@opensumi/ide-overlay';
import { Emitter, IQuickInputService } from '@opensumi/ide-core-browser';
import { ITodoService } from '../common';

@Injectable()
export class TodoService implements ITodoService {
  @Autowired(IMessageService)
  private messageService: IMessageService;

  @Autowired(IQuickInputService)
  private quickInputService: IQuickInputService;

  private onDidChangeEmitter: Emitter<string> = new Emitter();

  get onDidChange() {
    return this.onDidChangeEmitter.event;
  }

  showMessage = (message: string) => {
    this.messageService.info(message);
  };

  addTodo = async () => {
    const param = await this.quickInputService.open({
      placeHolder: '输入你的计划',
      value: ''
    });
    if (param !== undefined && param !== null) {
      this.onDidChangeEmitter.fire(param);
    }
  };
}
注册命令及快捷键:
// modules/todo/browser/todo.contribution.ts

import { Autowired } from '@opensumi/di';
import {
  CommandContribution,
  CommandRegistry,
  Domain,
  KeybindingContribution,
  KeybindingRegistry,
  localize
} from '@opensumi/ide-core-browser';
import { EXPLORER_CONTAINER_ID } from '@opensumi/ide-explorer/lib/browser/explorer-contribution';
import {
  MainLayoutContribution,
  IMainLayoutService
} from '@opensumi/ide-main-layout';
import { ITodoService, TODO_COMMANDS } from '../common';
import { Todo } from './todo.view';

@Domain(MainLayoutContribution, CommandContribution, KeybindingContribution)
export class TodoContribution
  implements
    MainLayoutContribution,
    CommandContribution,
    KeybindingContribution {
  @Autowired(IMainLayoutService)
  private mainLayoutService: IMainLayoutService;

  @Autowired(ITodoService)
  private todoService: ITodoService;

  onDidRender() {
    this.mainLayoutService.collectViewComponent(
      {
        component: Todo,
        collapsed: false,
        id: 'todo-view',
        name: 'Todo'
      },
      EXPLORER_CONTAINER_ID
    );
  }

  registerCommands(registry: CommandRegistry) {
    registry.registerCommand(TODO_COMMANDS.ADD_TODO, {
      execute: () => {
        return this.todoService.addTodo();
      }
    });
  }

  registerKeybindings(registry: KeybindingRegistry) {
    registry.registerKeybinding({
      keybinding: 'cmd+o',
      command: TODO_COMMANDS.ADD_TODO.id
    });
  }
}
在视图中使用自定义服务提供的 onDidChange ,于是在使用快捷键添加 Todo 项后,新 Todo 项就会渲染在界面中:
// modules/todo/browser/todo.view.tsx

...
export const Todo = ({
  viewState
}: React.PropsWithChildren<{ viewState: ViewState }>) => {
  ...
  const { showMessage, onDidChange } = useInjectable<ITodoService>(ITodoService);

  React.useEffect(() => {
    const disposable = onDidChange((value: string) => {
      const newTodos = todos.slice(0);
      newTodos.push({
        description: value,
        isChecked: false,
      });
      setTodos(newTodos);
    });
    return () => {
      disposable.dispose();
    };
  }, [todos]);
 ...
};
效果展示

下一节,我们将进一步学习如何进行前后端双向通信,来实现双向的服务调用。
